
We have all used tools like speedtest.net to test upload and download speeds. Whether it was to test the WiFi in that coffee shop (I use my own tether, never unknown hot spots), preparing for a LAN party (do people still do that?), or just a step in troubleshooting, we have all been there. For one reason or another you simply think you are being cheated of bandwidth, so you want independent verification of your speeds. This typically means opening a browser and going to a website to test your connection. But what if you want to run a speed test on a remote server? In this article we will discuss running an internet speed test from the Linux command line, and skipping the browser.
There is something about the raw efficiency of the command line that I am really attracted to. As I discussed in the article "5 Command Line Tool to Break Your Dependence on the GUI", I try my best to stay away from the browser. It usually creates an unnecessary distraction. The internet is designed to grab your attention like a laser pointer does to a cat. So let's get started, and figure out one more way to stay away from the GUI.
Different Speed Test Packages
There are a few different tools you can use to run a speed test from the command line. To make things even more confusing the two most popular share the same exact name, but both use the speedtest.net service.
Unofficial Speedtest-CLI Python Script
The first one is an independently written Python script that is simple to install and use. It is available in the default repositories for some popular Linux distributions.
Pros:
- Easy to install
- Wide Availability
- Full list of servers
- Can specify upload test, download test, or both
Cons:
- Minimal output format options
- No verbose output option
Jump to "Installing speedtest-cli Python Script" or "How to Use speedtest-cli Python Script".
Official Ookla Speedtest CLI
The second tool is built by Ookla, the people who bring you the speedtest.net website and service. Installing it requires you to add a repo for your package manager. But the maintainers offer simple instructions for installation.
Pros:
- Official release from Ookla
- More robust formatting options
- Output easier to read, better layout
- Verbose output available
- Has repo making it easy to get updates
Cons:
- Use limited to nearby servers
- Cannot specify download or upload only
Jump to "Official Ookla Speedtest CLI"
The Speedtest-cli Python Script
This is an easy way to get started running a speed test on the Linux command line.
Installing the Speedtest-cli Python Script
Simply use your package manager to install the package.
Install on Fedora using DNF
sudo dnf install speedtest-cli
Ubuntu or Debian using APT
sudo apt-get install speedtest-cli
CentOS/Red Hat 7 / 8
Unfortunately, CentOS does not offer the rpm in their repos. It can still be easily installed.
Change to /usr/bin directory to make command available to all users:
cd /usr/bin
Install dependencies:
sudo yum install -y python wget
Fetch script from github:
sudo wget https://raw.githubusercontent.com/sivel/speedtest-cli/master/speedtest.py -O speedtest-cli
Make script executable:
sudo chmod +x speedtest-cli
Or just copy and paste the whole thing below as a single line:
cd /usr/bin; sudo yum install -y python wget && wget https://raw.githubusercontent.com/sivel/speedtest-cli/master/speedtest.py -O speedtest-cli && sudo chmod +x speedtest-cli
How to Use the Python Script to Run a Speed Test
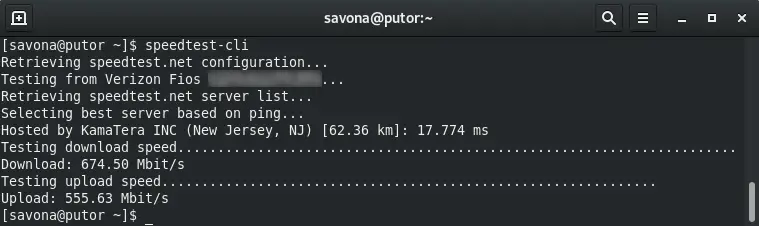
The most basic usage is to simply run the command. It will automatically select the best server based on ping responses.
Speedtest-cli Python Script Options
There are several options available to change the default behavior. Here we will outline the most popular options.
List Available Speed Test Servers
You can use the --list option to find a list of available servers to run your test against. At the time of writing this list is pretty extensive with 8829 possible servers.
NOTE: The servers are sorted by distance, closest first.
[savona@putor ~]$ speedtest-cli --list
 Retrieving speedtest.net configuration…
  4847) Hotwire Fision (Philadelphia, PA, United States) [10.92 km]
 10979) School District of Philadelphia (Philadelphia, PA, United States) [10.92 km]
...OUTPUT TRUNCATED...
Specify Specific Server to Test Against
Once you have found the server you want to test against, you can use the --server <SERVER ID> to select it. The server ID is the first column in the output of the list option above.
[savona@putor ~]$ speedtest-cli --server 4847
 Retrieving speedtest.net configuration…
 Testing from Verizon Fios (x.x.x.x)…
 Retrieving speedtest.net server list…
 Selecting best server based on ping…
 Hosted by School District of Philadelphia (Philadelphia, PA) [10.92 km]: 25.033 ms
 Testing download speed……………………………………………………………………..
 Download: 384.07 Mbit/s
 Testing upload speed…………………………………………………………………………………………
 Upload: 417.93 Mbit/s
Only Test Upload or Download Speeds
The option is actually designed to exclude a test. But since there are only two options it is effectively the same as selecting only one. To run only the download test, you exclude the upload, and vice versa.
[savona@putor ~]$ speedtest-cli --no-upload
 Retrieving speedtest.net configuration…
 Testing from Verizon Fios (x.x.x.x)…
 Retrieving speedtest.net server list…
 Selecting best server based on ping…
 Hosted by KamaTera INC (New Jersey, NJ) [62.36 km]: 19.785 ms
 Testing download speed……………………………………………………………………..
 Download: 600.89 Mbit/s
 Skipping upload test
Format Output in JSON or CSV
You can specify the output format in JSON or CSV. You also have the opton to use CSV with a custom delimiter. This is handy if you are going to use the output in some other script or application.
[savona@putor ~]$ speedtest-cli --json
 {"download": 597726146.0529929, "upload": 562476134.8046777, "ping": 17.004, "server": {"url": "http://speedtest.us-ny2.kamatera.com:8080/speedtest/upload.php", "lat": "40.0583", "lon": "-74.4057", "name": "New Jersey, NJ", "country": "United States", "cc": "US", "sponsor": "KamaTera INC", "id": "11612"
...OUTPUT TRUNCATED...
Using CSV with a custom delimiter. The default delimiter is a comma, which is implied by the name CSV. Here we use the --csv-delimiter option to change the delimiter to a pipe character.
[savona@putor ~]$ speedtest-cli --csv --csv-delimiter "|"
 11612|KamaTera INC|New Jersey, NJ|2019-11-17T14:51:53.636981Z|62.35865439150934|8.546|588013638.8767571|512001168.48230773||x.x.x.x
The Official Ookla Speedtest CLI
The official Speedtest CLI (Command Line Interface) from Ookla is a little more robust. It has all of the options of the python script and more. There are also several output formats not available with the unofficial python script.
Ookla's speedtest is also a little easier on the eyes. It spreads the information out which makes it easier to read and displays a neat little progress bar. A URL you can use to share the results is also displayed by default.
Installing the Official Speedtest CLI
Install Speedtest CLI on Ubuntu / Debian:
The Speedtest CLI from Ookla is supported on Ubuntu (xenial & bionic) and Debian (jessie, stretch, buster).
$ sudo apt-get install gnupg1 apt-transport-https dirmngr
$ export INSTALL_KEY=379CE192D401AB61
$ export DEB_DISTRO=$(lsb_release -sc)
$ sudo apt-key adv --keyserver keyserver.ubuntu.com --recv-keys $INSTALL_KEY
$ echo "deb https://ookla.bintray.com/debian ${DEB_DISTRO} main" | sudo tee  /etc/apt/sources.list.d/speedtest.list
$ sudo apt-get update
$ sudo apt-get install speedtest
Install Speedtest CLI on Fedora / Redhat / CentOS:
Fedora has moved on to DNF for package management, but is still compatible with YUM. These instructions were tested on Fedora 31, CentOS 7 and Red Hat 8.
$ sudo yum install wget
$ wget https://bintray.com/ookla/rhel/rpm -O bintray-ookla-rhel.repo
$ sudo mv bintray-ookla-rhel.repo /etc/yum.repos.d/
$ sudo yum install speedtest
How to Use the Official Speedtest CLI
Once installed you can simply call the utility by typing "speedtest" at the command line. This will give you all the default information that you would see on the web version of speedtest.net.

Official Speedtest CLI Options
The options available in the official release are more robust. Here we will outline the popular options and how to use them.
List Available Speed Test Servers
Using the -L (--servers) option will give you a list of servers available to run a test against. This option will only show you servers that are "nearby". What exactly determines nearby is undefined. But for me it looks like they are staying in the tri-state area (PA, NJ, DE).
[savona@putor ~]$ speedtest -L
 Closest servers:
     ID  Name                           Location             Country
 4847  Hotwire Fision                 Philadelphia, PA     United States
  10979  School District of Philadelphia Philadelphia, PA     United States
   9840  Comcast                        New Castle, DE       United States
  11612  KamaTera INC                   New Jersey, NJ       United States
...OUTPUT TRUNCATED...
Optionally, you can use the -o (--host) option and specify the FQDN of the server instead of the ID. But oddly, I don't see a way to get the FQDN of the servers on the list. I am guessing this option is available for using a custom server.
I haven't found a way to list all servers. If you are looking to test against a server on the other side of the country, you will have to find it another way.
Select Specific Server to Run Speed Test Against
You can use the -s (--server-id) option to select a server to use from the list. You must supply the server ID with this option. The server ID is the number in the first column of the list output above.
[savona@putor ~]$ speedtest -s 4847
 Speedtest by Ookla
  Server: Hotwire Fision - Philadelphia, PA (id = 4847)
Change Unit Used for Speed Output
The -u (--unit) option can display the speed output in many different formats.
Decimal prefix, bits per second: bps, kbps, Mbps, Gbps
Decimal prefix, bytes per second: B/s, kB/s, MB/s, GB/s
Binary prefix, bits per second: kibps, Mibps, Gibps
Binary prefix, bytes per second: kiB/s, MiB/s, GiB/s
[savona@putor ~]$ speedtest -u MiB/s
 Speedtest by Ookla
  Server: Hotwire Fision - Philadelphia, PA (id = 4847)     ISP: Verizon Fios Latency:   10.67 ms   ( 0.95 ms jitter)
 Download:   63.45 MiB/s (data used: 700.2 MiB)
...OUTPUT TRUNCATED...
Output Formatting Options
The Ookla Speedtest CLI offers decent options for output formats.
- Human Readable - Default
- CSV - Comma Separated Value
- TSV - Tab Separated Value
- JSON - JavaScript Object Notation
- JSONL - JSON Lines
- JSON-PRETTY - JSON Pretty Printed
Here is an example using json-pretty.
[savona@putor ~]$ speedtest -f json-pretty
 {
     "type": "result",
     "timestamp": "2019-11-17T16:42:06Z",
     "ping": {
         "jitter": 0.29899999999999999,
         "latency": 17.474
     },
     "download": {
         "bandwidth": 92184614,
         "bytes": 491967724,
         "elapsed": 5303
     },
     "upload": {
         "bandwidth": 45010100,
         "bytes": 313859035,
         "elapsed": 6714
     },
...OUTPUT TRUNCATED...
Conclusion
Running a speed test from the command line may not be something that is needed on a daily basis for most people. However, it may prove useful in some troubleshooting situations.
In this article we cover how to run a speed test from the command line using two similar tools. The unofficial python script and the official Ookla Speedtest CLI. We discussed installing, using and setting options for each one. This should be enough to get you started.
For more information on these tools, visit their respective home pages found in the resources section below.
Great article!!!
Important to note: You cannot have speedtest-cli and the official speedtest package installed at the same time on a Debian based distro. I am not sure about other distros but this is the reason why...
$ sudo apt-get install speedtestReading package lists... Done
Building dependency tree
Reading state information... Done
The following NEW packages will be installed:
speedtest
0 upgraded, 1 newly installed, 0 to remove and 2 not upgraded.
Need to get 0 B/930 kB of archives.
After this operation, 2,257 kB of additional disk space will be used.
(Reading database ... 95496 files and directories currently installed.)
Preparing to unpack .../speedtest_1.0.0.2-1.5ae238b_amd64.deb ...
Unpacking speedtest (1.0.0.2-1.5ae238b) ...
dpkg: error processing archive /var/cache/apt/archives/speedtest_1.0.0.2-1.5ae238b_amd64.deb (--unpack):
trying to overwrite '/usr/bin/speedtest', which is also in package speedtest-cli 1.0.0-1
dpkg-deb: error: subprocess paste was killed by signal (Broken pipe)
Errors were encountered while processing:
/var/cache/apt/archives/speedtest_1.0.0.2-1.5ae238b_amd64.deb
E: Sub-process /usr/bin/dpkg returned an error code (1)
I think /ubr/bin/speedtest is a symlink to /usr/bin/speedtest-cli. If you remove that symlink first can you have both installed?
If the author instructed folks to drop the downloaded script into /usr/local/bin/ instead then you wouldn't run into this conflict (although you'd then have to specify the full path when running one or the other, depending on your ${PATH}).
Even better, download it into and run it from a per-user directory (such as ${HOME}/.local/bin/) so that you're not doing so as root -- a very bad practice!
I think the instructions are saying to install it in /usr/bin so it is available to all users. You are only installing in /usr/bin, then it can be executed as a regular user.
I do this:
wget -URL REMOVED- -O /dev/null
Effectively zero latency on both the source and the destination. I'm pretty sure that cachefly has more than enough bandwidth to allow this to be a certain measurement of my local pip. Also, it doesn't do anything that my ISP could detect as a speed test. That makes me feel more secure.
If you feel like you need a bigger file, you can replace the 100mb with a 400mb. I think there are some others, too.
speedtest-cli appears to not be accurate, at least not for higher bandwidth connections. It was showing ~350Bb for my 1Gb connection, while the official speedtest was showing ~970Mb.
Same observation here.
Two Things:
Ookla has a new install process. For CentOS/Fedora/RHEL
curl -s https://install.speedtest.net/app/cli/install.rpm.sh > install.rpm.sh
sudo yum install speedtest
If you want to install this on Rocky Linux, you'll need to apply this patch to *install.rpm.sh* So download it by dropping the " | sudo bash" from the first line, modify the script, then "sudo bash install.rpm.sh", then "sudo yum install speedtest"
(I hope this formats correctly!)
--- install.rpm.sh      2021-08-30 19:12:18.033705654 -0500

+++ install.rocky.sh    2021-08-30 19:09:37.790829733 -0500

@@ -6,6 +6,8 @@

 # Matches supported platforms at: https://packagecloud.io/ookla/speedtest-cli
SUPPORTED=false
+[[ "${OS_RELEASE_ID}" == "rocky" && "${OS_RELEASE_VERSION_ID}" == "8" ]] && SUPPORTED=true
+
[[ "${OS_RELEASE_ID}" == "centos" && "${OS_RELEASE_VERSION_ID}" == "7" ]] && SUPPORTED=true
[[ "${OS_RELEASE_ID}" == "centos" && "${OS_RELEASE_VERSION_ID}" == "8" ]] && SUPPORTED=true